
You all know by now that I can’t do anything halfway. So, when I knew I was going to be doing this bathroom, I wanted there to be some built in shelves. I don’t really understand why tubs and showers are not designed with more storage – we KNOW we are going to need it. Why add in stupid suction cup shelves later?
Well the answer is because they are HARD. And unless you are building a new house, difficult because the shelf eats space behind it. But I had an entire bedroom worth of space to eat up on one side, and about four inches of extra space on the one end side. So I decided to build not one, but TWO shelves.
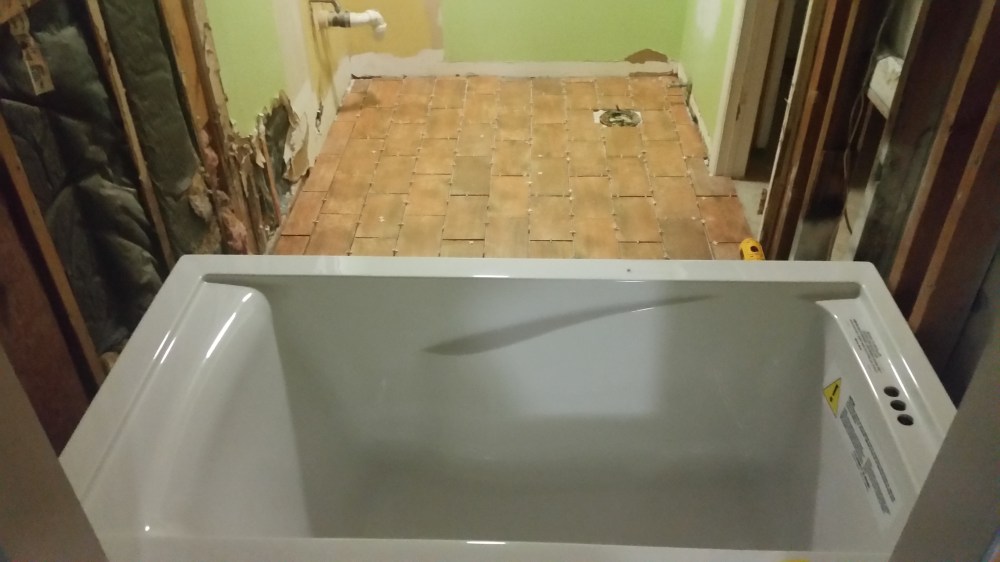
First, here is the tub in its new 32 by 60 inch home.
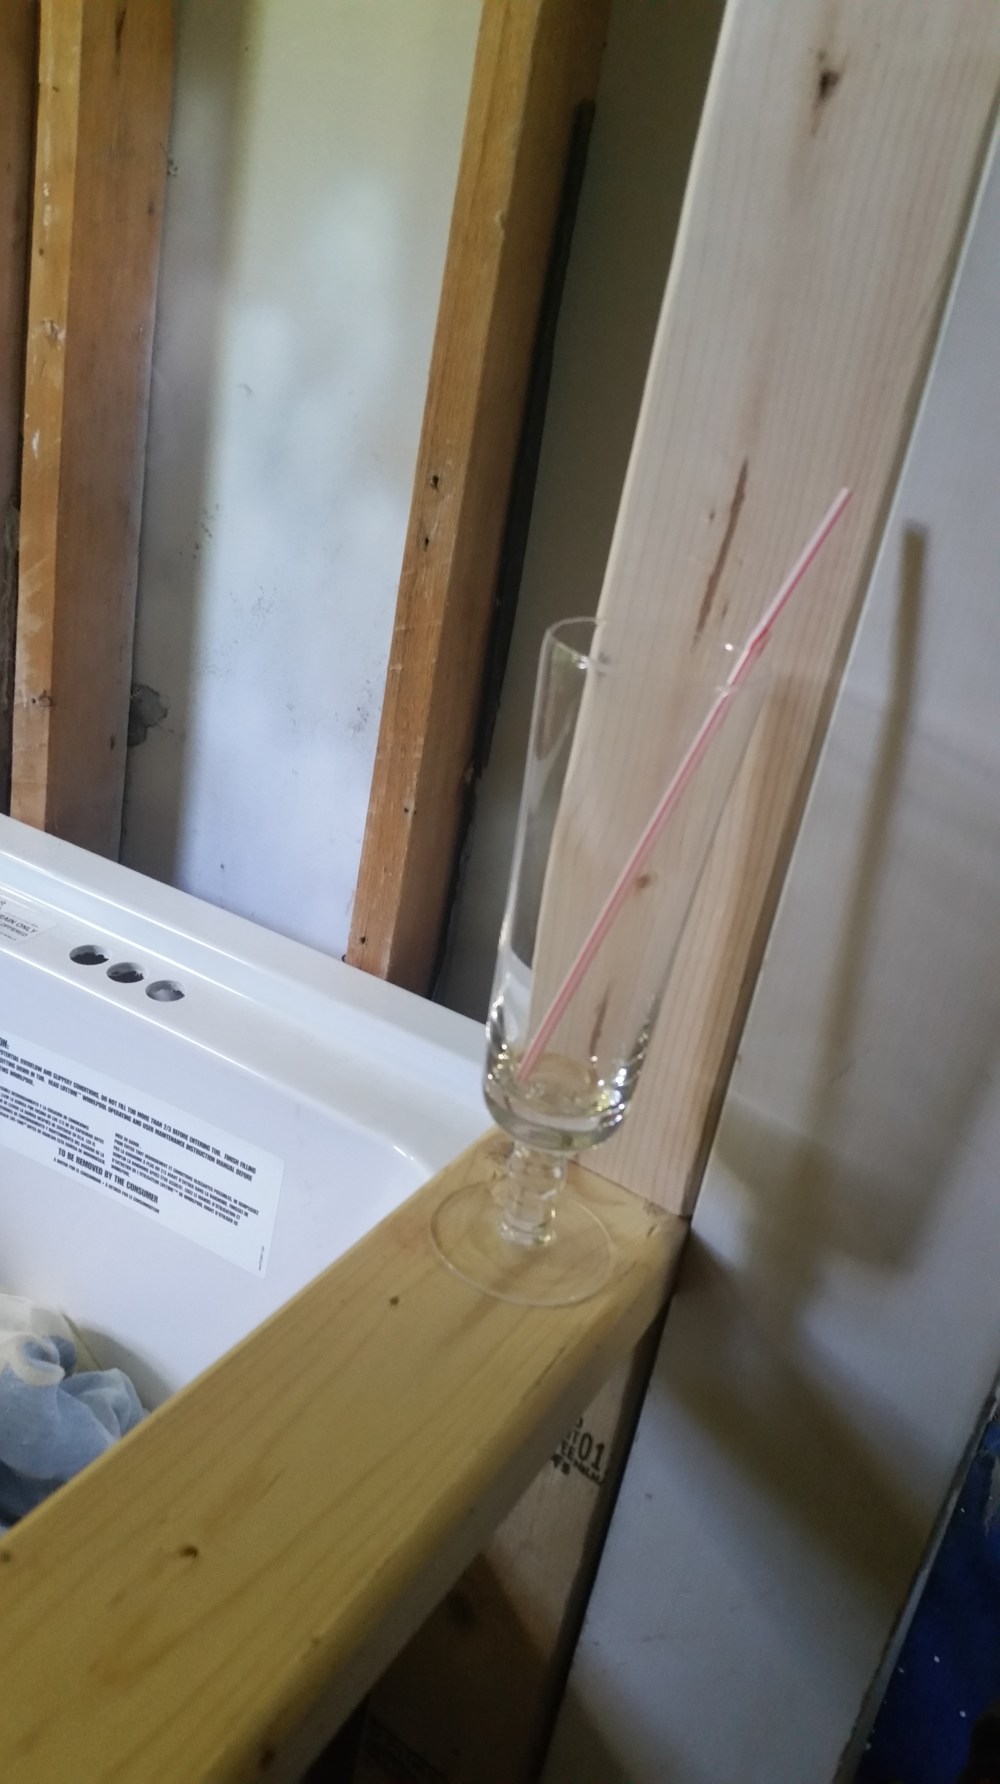
The shelf on the side was going to be the width of the closet doorway of the closet that was sacrificed to the tub. But I needed to determine a height. Obviously, the main purpose of a tub shelf is to hold the drink that you will be sipping when you are soaking in the tub, so obviously a mint julep glass + straw was needed to determine how high the shelf needed to be. Incidentally, it also fits the largest shampoo bottle I could find, but that’s just a bonus detail.
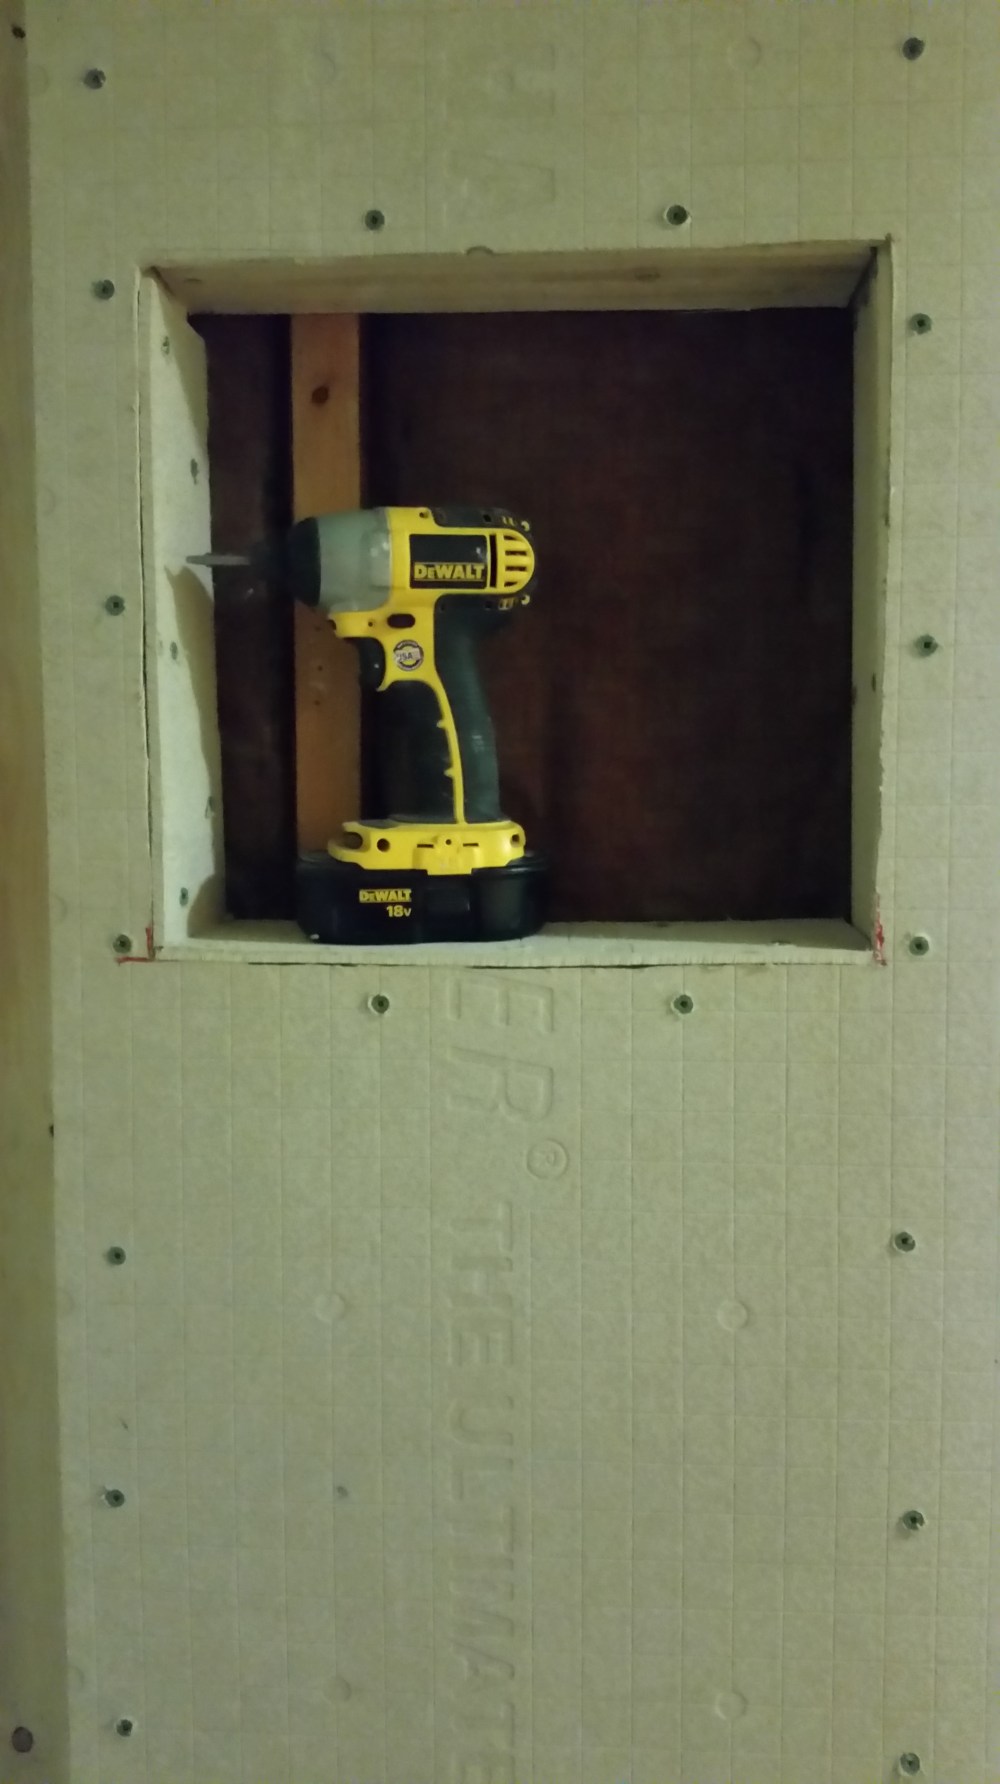
The end wall shelf was much smaller – its size was dictated by the studs in the wall, but don’t tell it or you will hurt its feelings.
Now, with a shelf in a shower you have something very important to consider, and that is WATER. I did not want standing water in these shelves. So, though you can’t tell from the pictures, the bottoms of the shelves tilt very slightly towards the tub, so water will run out of them.
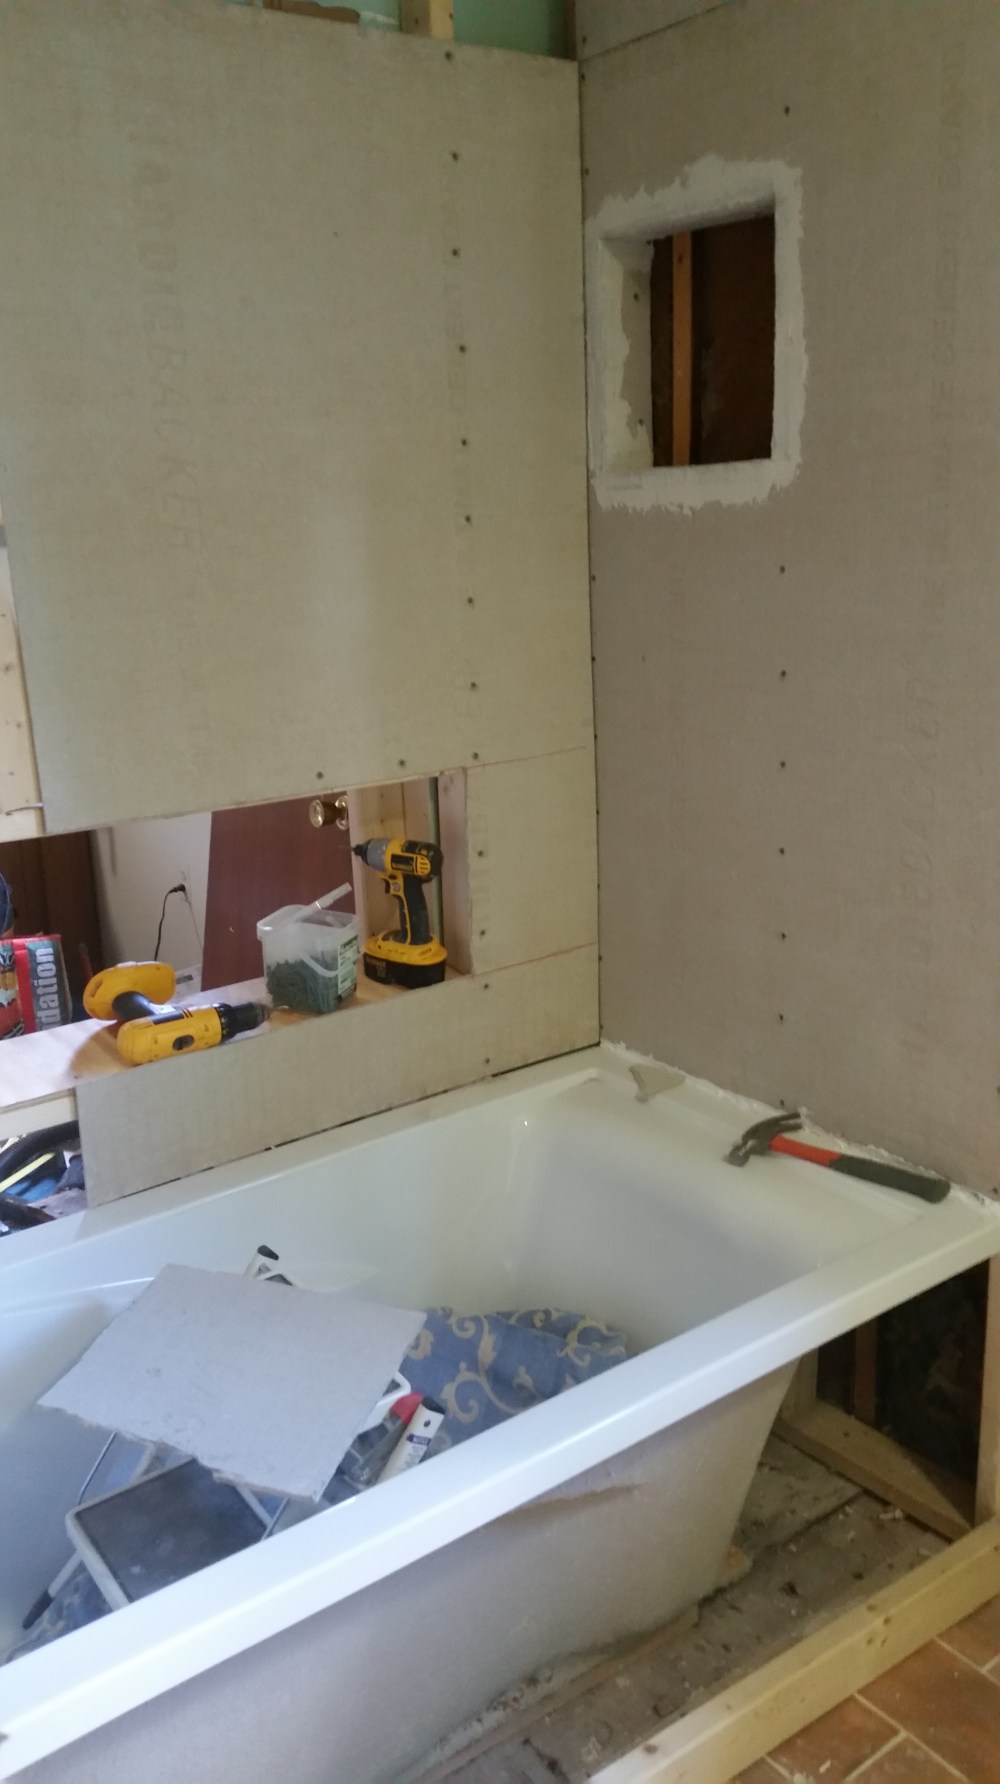
Backerboard going up. Also a wall is being created behind the tub.
So here is some nerd stuff nobody will care about. I was very concerned about water leaking behind the tub – since that is where the mold was coming from before. A lot of tubs have a small lip on the edge and you install your boards on top of and in front of this lip. This tub does not, because it is a freestanding tub that can be turned any direction. So I did a lot of research on how to create that joint where the tile meets the tub. Basically what I learned is that the backerboard should float – it should not touch the tub. Then silicone is added to fill the gap. Then you tile all the way down to the tub, then grout over the tile. So in this picture you can see one piece is already sealed with silicone and the other is still floating. Pretty neat.
